25 Best Small Kitchen Cabinet Organization Ideas for Less Clutter
Small kitchens can feel crowded fast—especially when cabinets become a jumble of pans, containers, mugs, and everyday essentials. The good news?
A few smart changes can make even the tightest cabinet feel surprisingly spacious.
These 25 Kitchen Cabinet Organization Ideas are designed to help you use awkward corners, empty shelf space, cabinet doors, and deep storage more effectively.
You’ll find practical setups for cookware, dishes, containers, spices, cleaning supplies, and small tools, with simple ways to make everything easier to see and reach.
The goal isn’t a perfect showroom cabinet; it’s a system that works with your real routine.
In my experience, the best organizing ideas are the ones that make putting things away almost effortless.
As you explore these ideas, look for one small change that could immediately make your kitchen calmer, clearer, and easier to use.
Also visit: 25 Beautiful Kitchen Countertop Decor Ideas for a Neat Space
1. Stacked Dish Zones
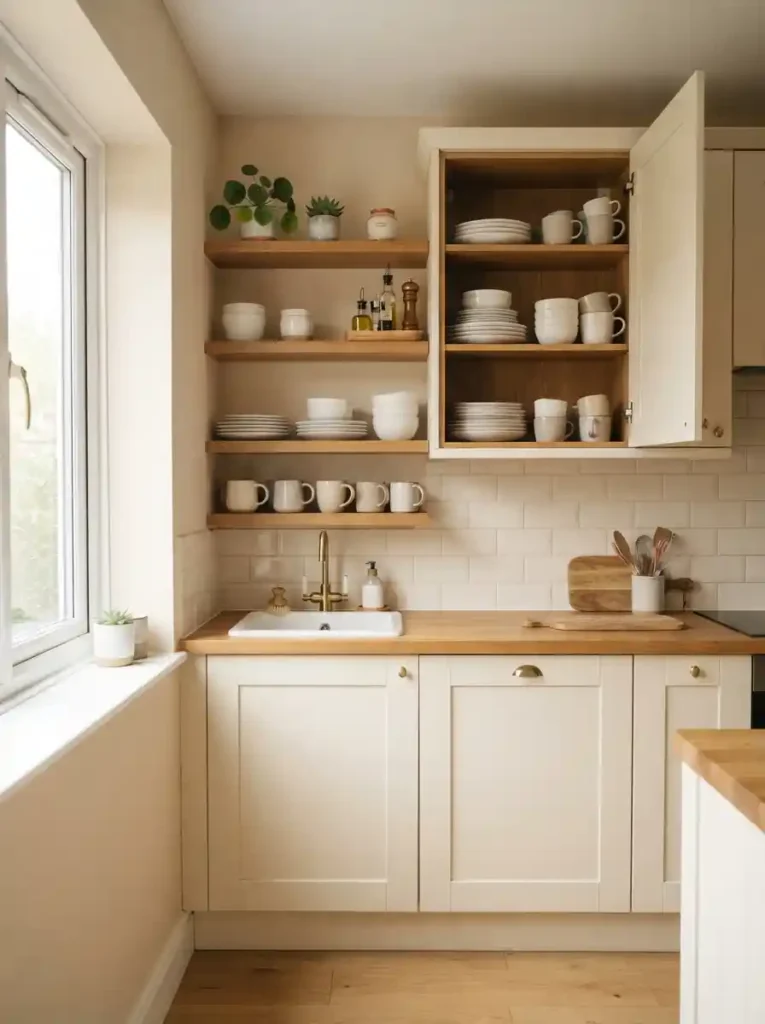
- Keep plates, bowls, and mugs grouped by everyday use.
- Place frequently used dishes on the easiest shelf to reach.
- Leave small gaps between stacks for smoother handling.
- Move occasional serving pieces to higher or farther shelves.
- A simple category system makes daily resets much easier.
A tidy cabinet can change the way a small kitchen feels. Start by grouping everyday plates, bowls, and mugs by use rather than by size alone. Place the pieces you reach for most often on the easiest shelf to access, keeping occasional serving ware higher or farther back. This simple arrangement reduces daily searching and prevents stacks from becoming messy. In my experience, matching categories to real routines makes organization easier to maintain than creating a picture-perfect system. Leave a little breathing room between stacks so shelves look calmer, items lift out smoothly, and the cabinet stays useful during busy mornings.
For a polished look, choose one shelf zone for each category and keep similar pieces together. White or neutral dishes can create a clean visual rhythm, while one small stack of colored bowls adds personality without making the cabinet feel busy. If shelves are deep, place less-used pieces behind the daily items only when they remain easy to retrieve. A quick test is to open the door and remove your most-used dish with one hand. If another item has to move first, the setup needs adjusting. This approach turns crowded storage into a practical, easy-to-reset kitchen zone.
2. Vertical Pan Dividers
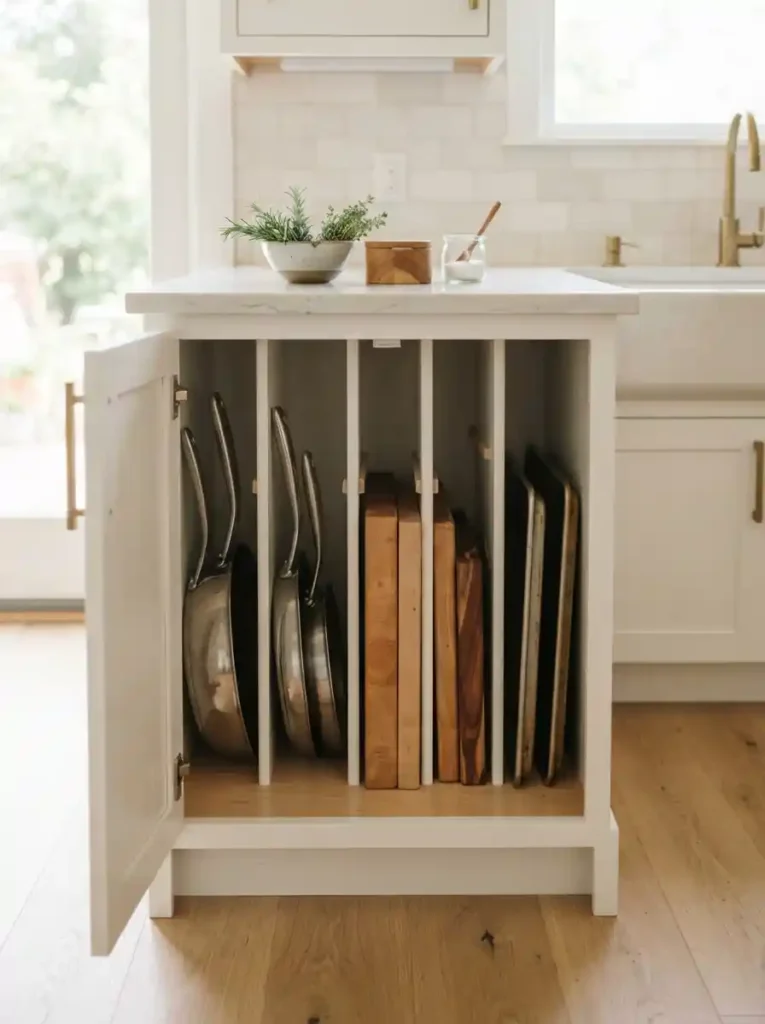
- Store frying pans and baking sheets upright instead of stacked.
- Use slim dividers to create separate vertical slots.
- Keep heavier cookware toward the bottom for stability.
- Choose adjustable organizers that fit the cabinet width.
- Vertical storage makes awkward cookware much easier to grab.
Small cabinets often become frustrating when pans and baking sheets are stacked into one heavy pile. Upright dividers solve that problem by giving each piece its own slot, making this one of the most practical kitchen cabinet organization ideas for tight spaces. Instead of lifting several pans to reach the one underneath, you can simply pull out the needed item. Choose sturdy metal or wood dividers that can handle cookware weight, and measure the cabinet before buying. Keep the heaviest pieces in stable positions, while frequently used pans should sit near the front for quick access.
A vertical arrangement also creates a surprisingly neat visual effect when the cabinet door opens. Baking sheets, cutting boards, and pans line up like files, so the interior looks structured instead of crowded. I’ve noticed this setup works especially well in kitchens where drawer space is limited because it uses cabinet height rather than valuable counter space. Leave enough width around each divider for comfortable removal without scraping nearby cookware. Once every item has a defined home, putting things away becomes almost automatic, which helps the cabinet stay organized between deeper cleanouts.
3. Pull-Out Shelf Trays
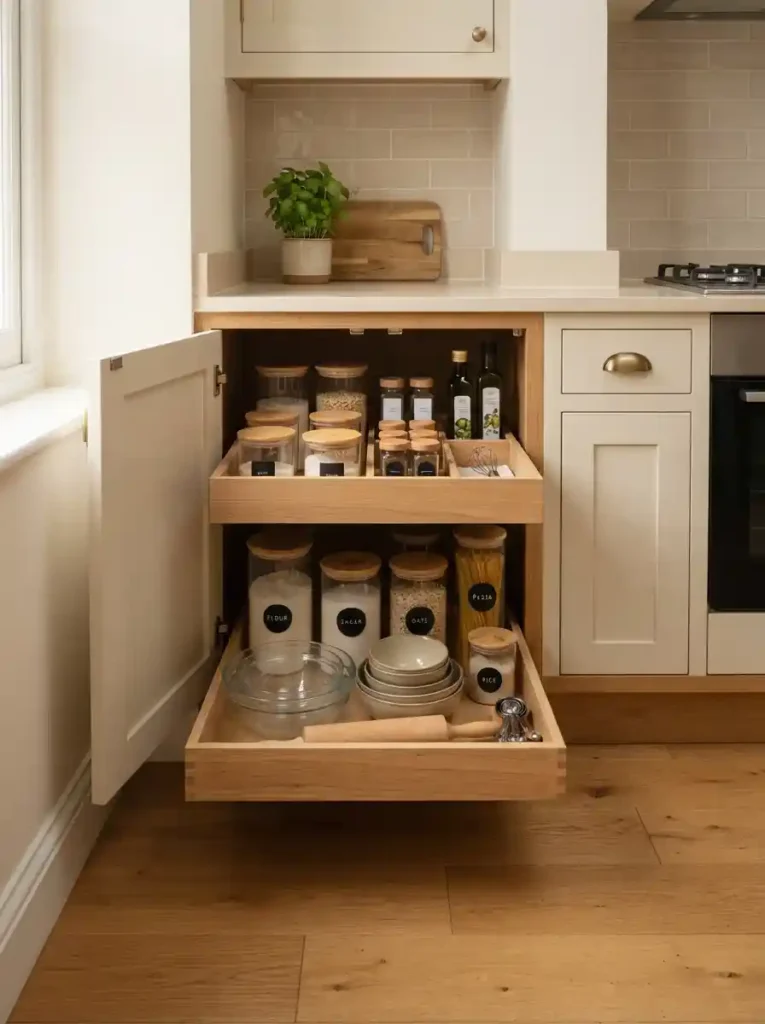
- Add sliding trays to deep lower cabinets.
- Keep everyday containers within easy reach.
- Reduce bending and searching at the back of shelves.
- Choose shallow trays for smaller cabinets and narrow spaces.
- Match tray finishes to the existing cabinet interior.
Deep cabinets can hide half your kitchen supplies, but pull-out trays make that wasted space far more useful. Instead of reaching blindly toward the back, slide the entire shelf forward and see everything at once. This setup is especially helpful for containers, mixing bowls, small appliances, and pantry overflow that tend to disappear behind larger items. Choose trays that fit the cabinet opening comfortably and leave enough clearance for hardware. For narrow kitchens, shallow pull-outs are often easier to manage than oversized shelves because they prevent items from becoming buried behind one another.
The biggest improvement is visibility. A sliding tray lets you organize items in clear groups while keeping the cabinet interior easy to scan. Put frequently used containers toward the front and reserve the back for less-used pieces. If you have a small kitchen with limited storage, this type of upgrade can make existing cabinets feel much larger without changing the room layout. In my experience, accessible storage is easier to maintain because you are less likely to leave something on the counter simply because returning it feels inconvenient.
4. Tiered Shelf Risers
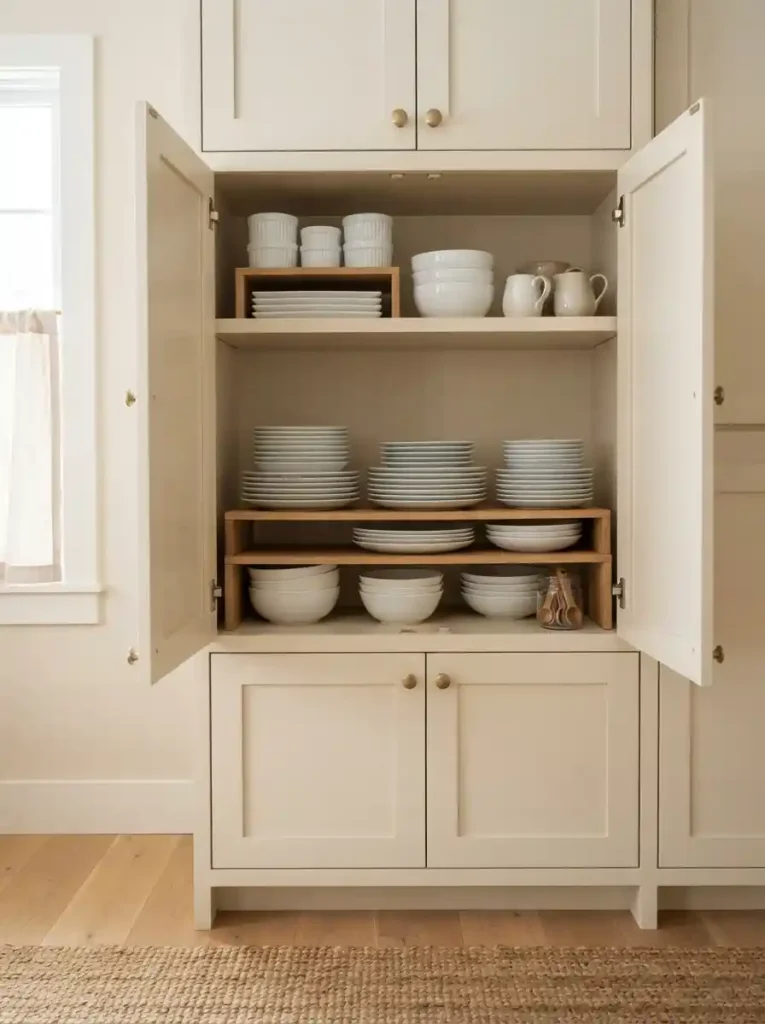
- Create a second storage level inside tall cabinets.
- Keep small plates and bowls easier to see.
- Use vertical space that would otherwise remain empty.
- Choose sturdy risers that match your shelf width.
- Keep heavier items on the lower level for stability.
A narrow cabinet can become much more efficient when every inch of vertical space has a purpose. Add slim risers to create a second level for small plates, saucers, ramekins, or food storage lids. The raised platform keeps lower items visible while making use of the empty air above them. Choose sturdy risers with enough clearance for comfortable lifting, and avoid stacking too high inside a cabinet. In my experience, this small adjustment works best when the upper tier holds lighter, frequently used pieces. The result feels less crowded because each item has a clear position instead of competing for one shelf.
Shelf risers are especially useful when cabinet shelves are tall but the stored items are short. Rather than leaving a large unused gap above one stack, create a compact upper zone and separate categories by level. Use one riser for everyday bowls and another for small serving dishes if the cabinet width allows. Keep the most frequently reached items at eye or hand level, while occasional pieces can stay on the upper tier. This arrangement improves visibility and makes putting things away faster. It also gives the cabinet a layered, intentional appearance without requiring a major storage renovation.
5. Door-Mounted Racks
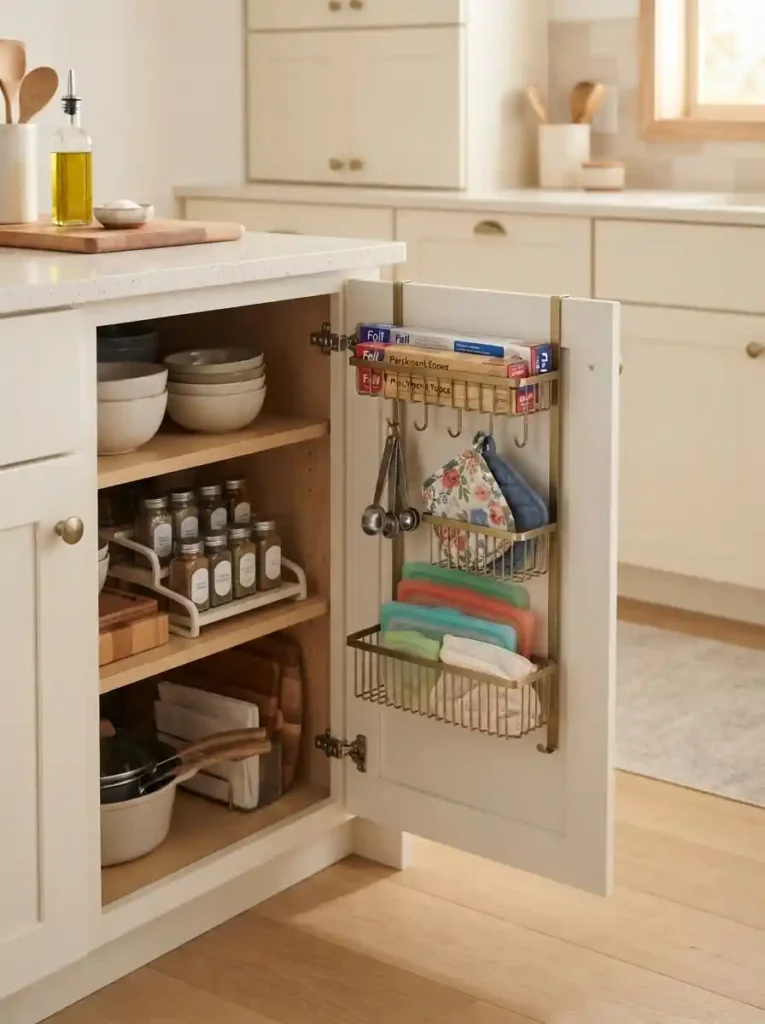
- Turn unused cabinet door space into practical storage.
- Hold lightweight accessories where they are easy to reach.
- Free shelf space for larger kitchen essentials.
- Use shallow racks that do not interfere with shelves.
- Keep the door lightly loaded for smooth opening.
When a cabinet door becomes a storage opportunity, small items stop taking up valuable shelf space. A slim door-mounted rack can hold measuring spoons, pot holders, wraps, cleaning cloths, or lightweight spice containers, depending on the cabinet location. Choose a rack that leaves enough clearance for shelves and cabinet hinges before installing it. Keep heavier objects off the door unless the hardware is designed to support them. A simple pocket or rail system can also prevent loose accessories from spreading across shelves. The goal is not to fill every inch, but to give small essentials a convenient, dedicated home.
Door storage works best when the items placed there are shallow and used regularly. Arrange them by function so opening the cabinet immediately reveals what you need, rather than creating another hidden pile. For example, measuring tools can stay together while wraps or reusable bags occupy a separate pocket. I’ve noticed that this approach is particularly helpful in compact kitchens because it protects shelf space for larger cookware and dishes. Keep labels facing outward when possible, and avoid overcrowding the rack. A little empty space makes the setup easier to use and keeps the cabinet door from feeling visually heavy.
6. Stackable Food Containers
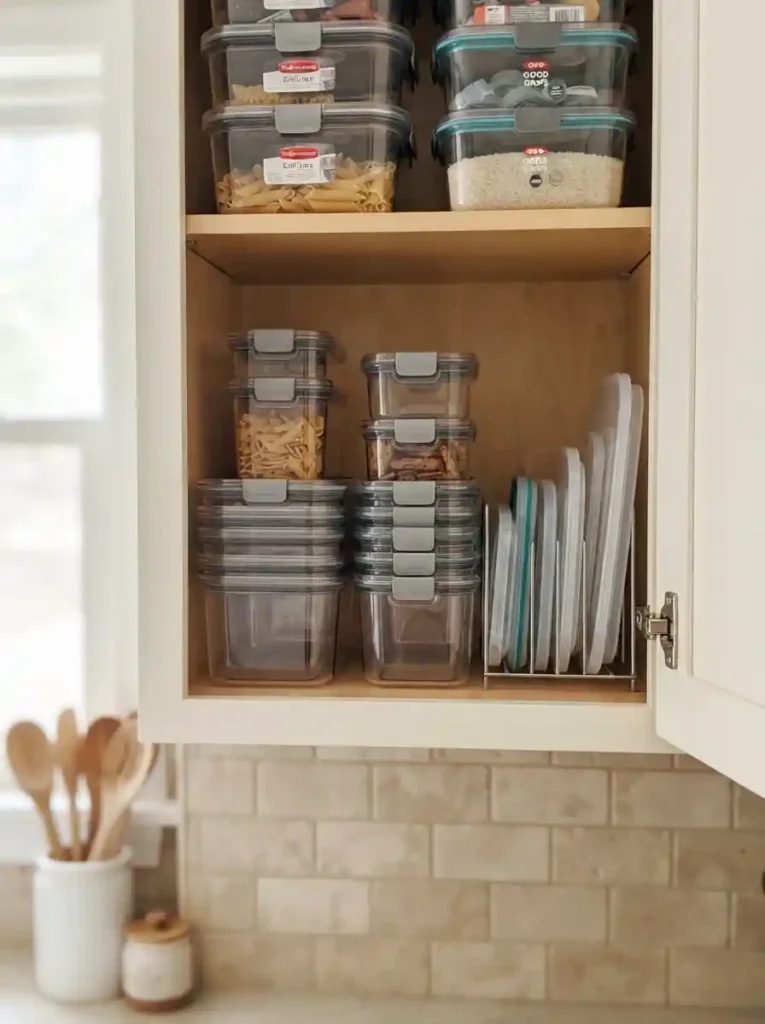
- Choose containers with matching shapes for easier stacking.
- Nest empty bases together to reduce wasted cabinet space.
- Keep lids upright instead of scattering them across shelves.
- Use clear containers for quick visual identification.
- Group sizes together so the cabinet stays easy to reset.
Containers become much easier to manage when their shapes match the storage space. Use a coordinated set of stackable food containers with flat lids, then nest the bases inside one another whenever possible. Store lids vertically in a slim holder beside the containers instead of scattering them across the shelf. Clear or lightly tinted containers make contents easier to identify without opening every piece. Choose sizes based on what you actually store rather than buying a large set that fills the cabinet. This creates a cleaner interior, reduces duplicate containers, and makes leftovers or pantry staples quicker to find.
For the best result, give each container size a defined zone and keep the most-used pieces closest to the front. Square and rectangular shapes usually make better use of shelf corners than many round containers, especially in narrow cabinets. If you already own mismatched pieces, group them by footprint before replacing anything; you may discover that a simple reset solves most of the problem. In my experience, the biggest improvement comes from controlling the lids, because loose lids quickly make an organized shelf look chaotic. A compact divider or small basket can keep them upright and easy to grab.
7. Corner Lazy Susan
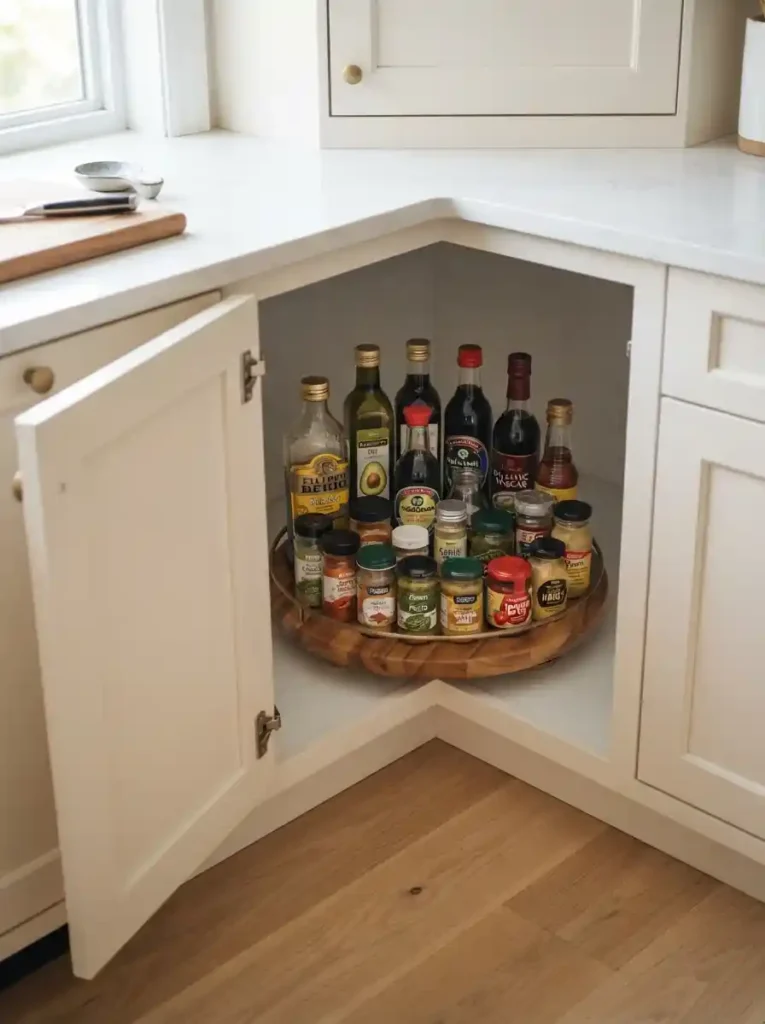
- Turn awkward corner space into accessible storage.
- Keep oils, sauces, and small jars easy to reach.
- Choose a compact turntable that fits the cabinet depth.
- Group similar bottles together for faster meal prep.
- Avoid overfilling the rotating surface.
Corner cabinets often hide useful storage behind awkward angles, but a small lazy Susan can bring those forgotten spaces back into everyday use. Place bottles, jars, sauces, or condiments on a rotating tray so everything can be reached without stretching deep into the cabinet. Choose a model that leaves enough clearance around the cabinet frame and shelves. Keep taller bottles toward the center and shorter jars around the outer edge for better visibility. This setup makes cooking smoother because you can rotate the tray instead of removing several items just to reach one container.
A rotating organizer also helps prevent duplicate purchases because ingredients remain visible. Group oils together, sauces together, and frequently used seasonings in one easy-to-reach section. Avoid filling the tray so tightly that bottles bump into one another when it turns. If your cabinet has a particularly narrow opening, measure the doorway rather than only the interior width before choosing a turntable. I’ve noticed that corner storage feels much more practical once everything can be viewed from the front. A little empty space around each item makes the entire cabinet easier to use.
8. Under-Shelf Baskets
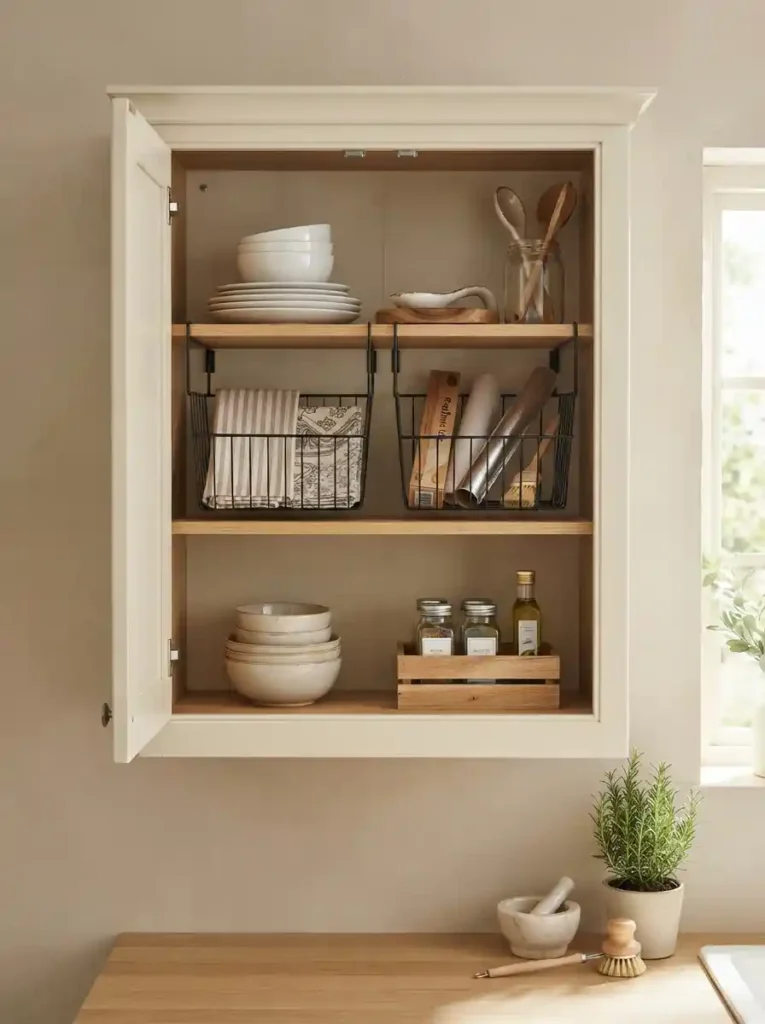
- Use the empty space beneath shelves for lightweight items.
- Store napkins, wraps, towels, or small accessories.
- Choose baskets with slim profiles for compact cabinets.
- Keep frequently used pieces at the front.
- Avoid placing tall items directly underneath.
Unused space beneath a cabinet shelf can become surprisingly valuable with a slim under-shelf basket. These baskets create an extra storage layer without requiring another shelf, making them useful for napkins, kitchen towels, parchment rolls, or lightweight accessories. Select a basket with a low profile so it does not reduce the clearance needed for items below. Before installing one, check the shelf thickness and the cabinet height to make sure everything still fits comfortably. This small addition works especially well in compact kitchens because it increases capacity while keeping the main shelf available for larger everyday items.
For a clean appearance, reserve each basket for one simple category instead of treating it like a catch-all container. A basket near the front can hold items you reach for frequently, while less-used supplies can stay farther back on the main shelf. Neutral wire, wood, or coated metal finishes blend easily with most cabinet interiors. In my experience, these small vertical additions are most useful when they solve one specific storage problem rather than trying to hold everything. Keep the basket lightly filled, and the cabinet will remain visually calm while giving forgotten vertical space a practical purpose.
9. Lid Storage Rails
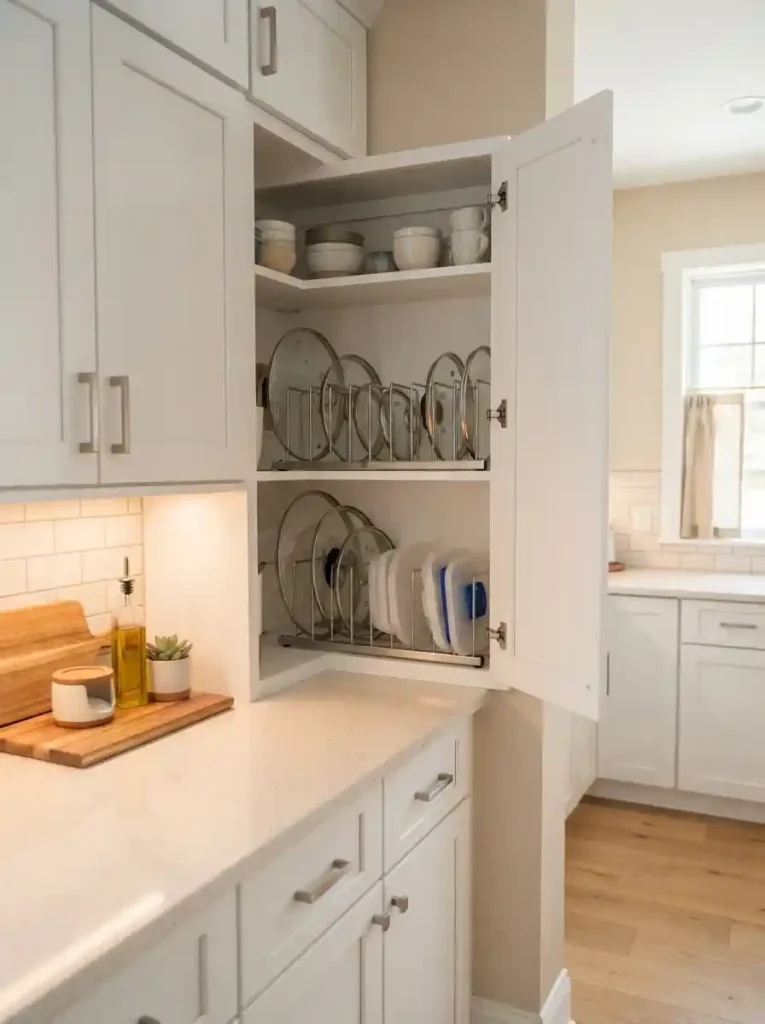
- Keep loose pot and container lids upright.
- Prevent lids from sliding into messy piles.
- Install slim rails along cabinet sides or doors.
- Group lids by size for faster selection.
- Leave enough spacing for comfortable removal.
Loose lids can quickly turn an organized cabinet into a frustrating pile, especially when several sizes look nearly identical. Slim storage rails give each lid a vertical position, allowing you to see and remove pieces individually. Mount the rails along a cabinet door or interior side panel where there is enough clearance for the lids to stand without blocking shelves. Group similar sizes together and place the most frequently used ones toward the front. This approach keeps cookware easier to access while freeing valuable shelf space for pots, pans, containers, or other kitchen essentials.
The best lid systems are simple enough to maintain after every use. Before installing rails, check the lid diameter and cabinet depth so the doors close completely without contact. If you prefer not to drill into cabinetry, freestanding dividers can create a similar vertical arrangement. I’ve seen this work particularly well in small kitchens where horizontal shelf space is limited. Instead of stacking lids underneath cookware, you give them their own compact zone. The cabinet immediately feels more orderly, and finding the right lid becomes a quick visual task rather than a search through a crowded stack.
10. Drawer-Style Bins
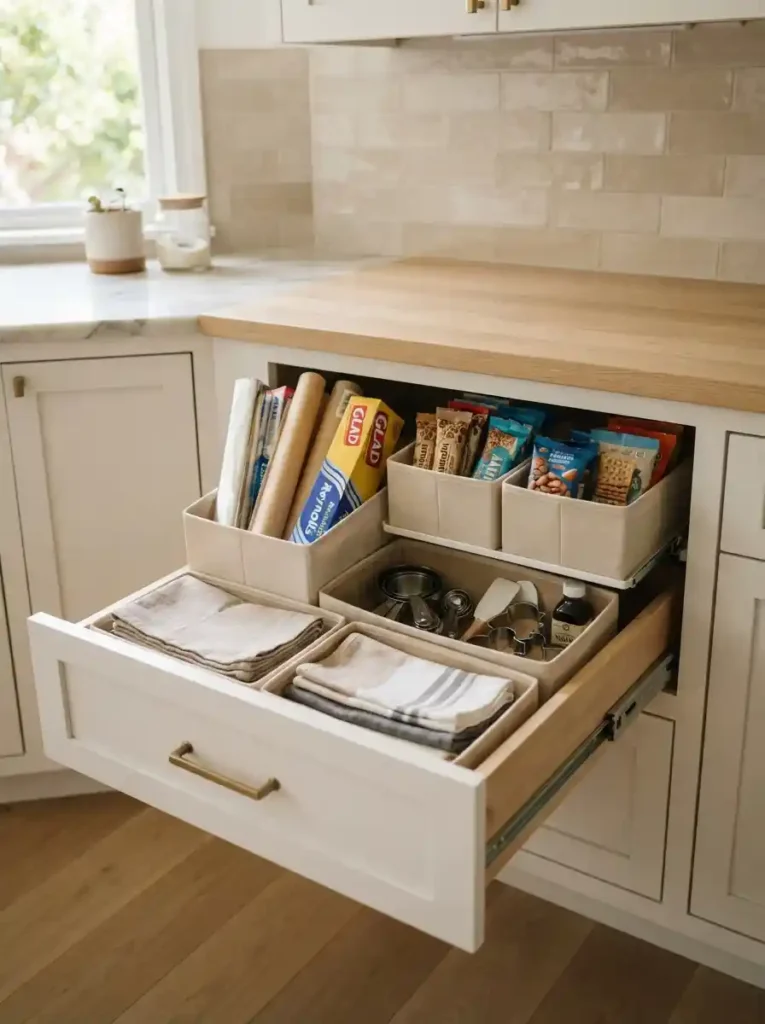
- Use bins to create pull-forward storage inside cabinets.
- Group small kitchen supplies by function.
- Choose low-sided containers for better visibility.
- Add simple labels when several categories look similar.
- Keep heavier bins on lower shelves for stability.
Cabinet shelves become easier to manage when small loose items have containers they can be pulled forward. Drawer-style bins create simple zones for kitchen wraps, snack packets, baking accessories, towels, or miscellaneous tools that would otherwise spread across the shelf. Choose bins with low sides so you can see their contents without digging. Group items by function rather than forcing every category into a separate container. When the bin slides forward, even items at the back remain accessible. This makes deep cabinets feel less frustrating and helps prevent the familiar habit of pushing things aside just to reach one small item.
For a polished setup, use matching bins in a neutral material such as clear plastic, woven fiber, or coated metal. The consistent shapes create visual order while still allowing you to customize what each container holds. Place the categories you use most near the front and reserve higher shelves for occasional supplies. Labels can help when several bins contain similar-looking items, but they are not necessary if the contents are obvious. In my experience, a small number of well-chosen bins works better than filling every shelf with containers. Leave enough space to remove each one comfortably.
11. Cutting Board Slots
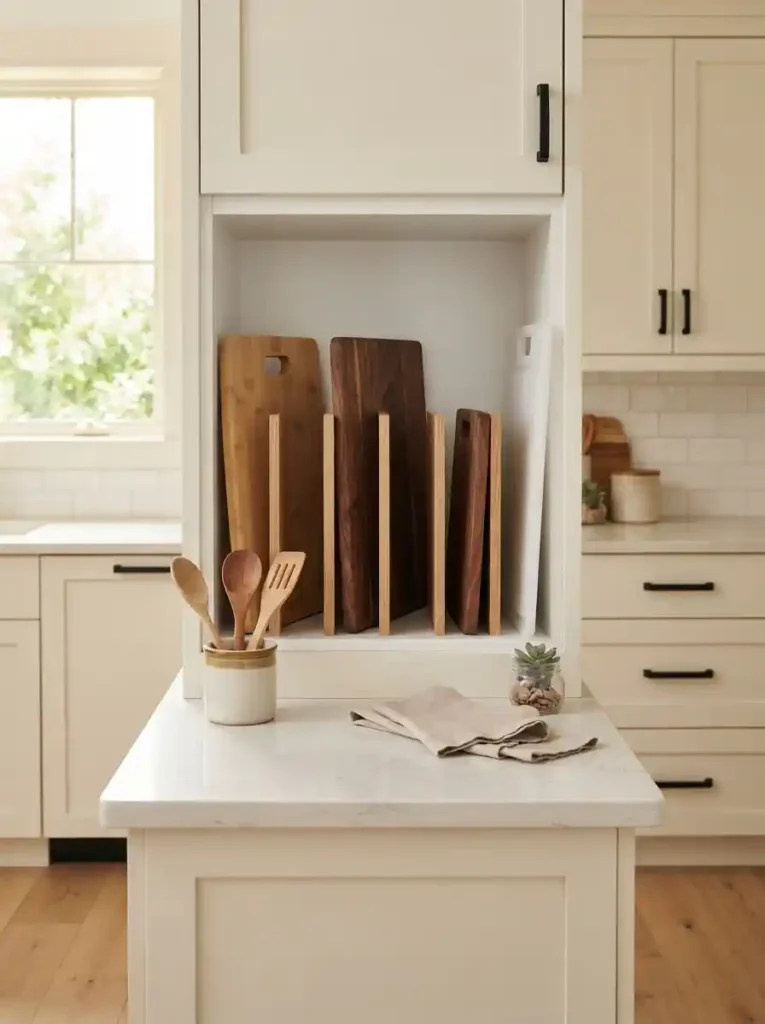
- Store cutting boards upright instead of stacking them flat.
- Keep boards separated by size and material.
- Use a narrow divider to create dedicated slots.
- Place everyday boards toward the cabinet front.
- Protect delicate wood surfaces from crowded storage.
Flat stacks of cutting boards can consume an entire shelf while making the board you need difficult to reach. Upright slots solve both problems by turning the boards vertically and giving each one a defined position. Use narrow dividers or a dedicated rack to separate wood, bamboo, plastic, and flexible boards by type. Place your everyday board closest to the cabinet opening and less-used serving boards farther back. This arrangement uses cabinet height efficiently and prevents boards from sliding over one another. It also makes it easier to lift one piece without disturbing everything stored beside it.
Keep wooden boards in a dry, well-ventilated area and avoid packing them tightly against damp surfaces. If the cabinet is near the sink, choose a location that does not trap moisture after washing. A simple vertical organizer can also hold baking trays, cooling racks, or slim serving platters if the dimensions allow. I’ve noticed that separating these flat items makes a cabinet feel instantly more spacious because the shelf surface becomes visible again. The organized rows also make it obvious where each board belongs, which helps keep the arrangement consistent after everyday cooking.
12. Spice Drawer Inserts
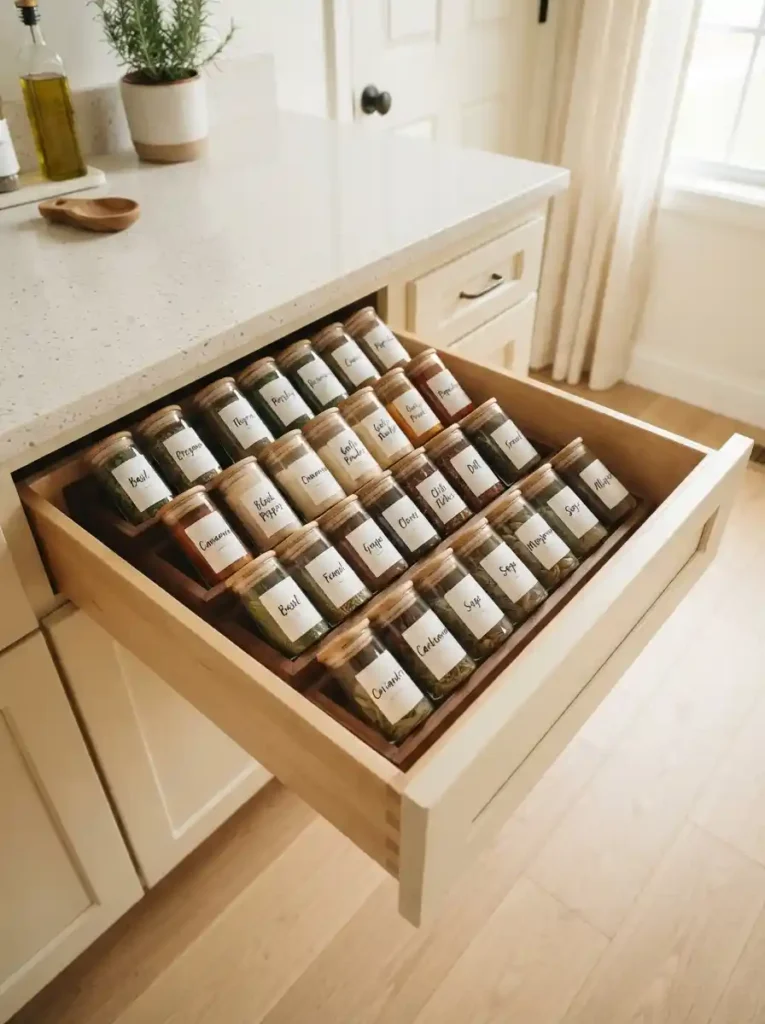
- Arrange spice jars in rows for quick identification.
- Use inserts to prevent containers from rolling around.
- Group spices by cooking frequency or category.
- Keep everyday seasonings closest to the drawer front.
- Choose a layout that fits your existing collection.
A spice collection becomes much easier to use when every jar stays visible in one organized layer. Instead of stacking containers inside a cabinet, use a drawer insert with shallow tiers or angled rows so labels face upward. Group everyday seasonings together and place less-used baking spices farther back. Measure the drawer before choosing an insert, especially if your cabinet hardware takes up interior space. Matching jars can create a polished look, but the real goal is visibility. When you can identify a spice without moving three others, cooking becomes faster and the drawer stays easier to maintain.
Avoid organizing spices alphabetically unless that genuinely matches the way you cook. A frequency-based system often feels more natural because the jars you reach for most remain closest to the front. You can also group them by purpose, such as baking, herbs, blends, and everyday seasonings. Use simple labels if existing packaging makes identification difficult. In my experience, a well-fitted insert is more useful than a large collection of tiny organizers because it keeps the drawer stable and leaves room for easy movement. A little structure prevents rolling jars and keeps the entire cabinet zone visually controlled.
13. Mug Hanging Hooks
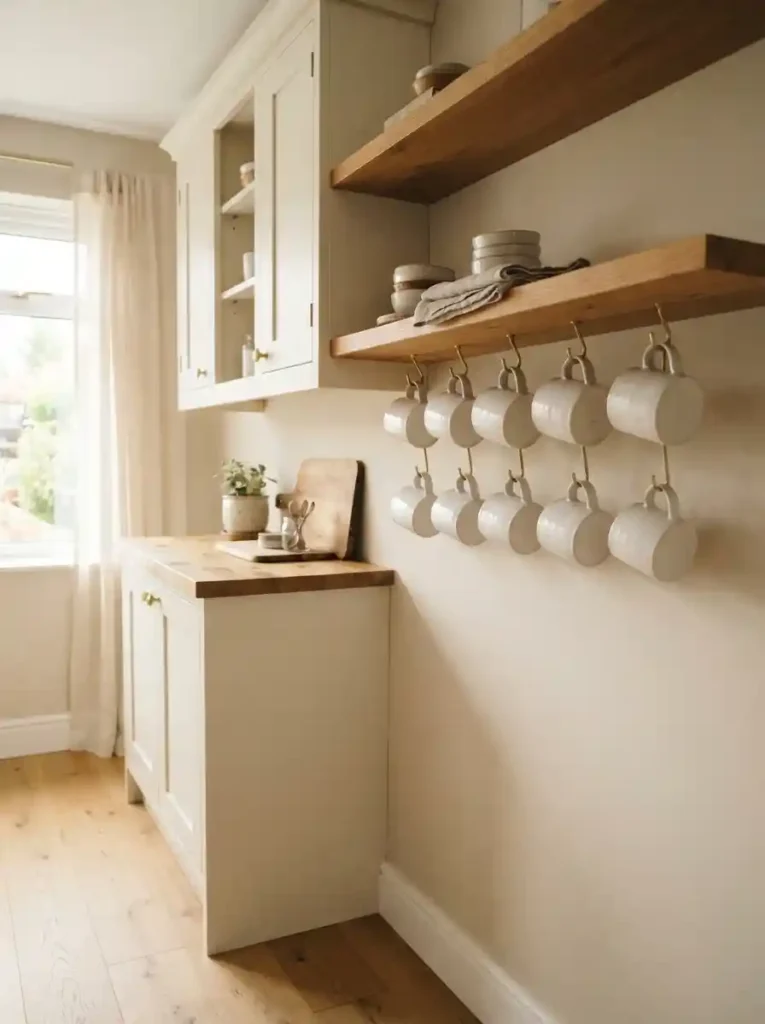
- Use the underside of shelves for everyday mugs.
- Free shelf space for bowls or pantry items.
- Choose sturdy hooks sized for your mug handles.
- Keep frequently used cups within easy reach.
- Leave enough space between mugs to prevent bumps.
Mugs can quickly crowd a small shelf, especially when every cup has to sit upright. Hanging hooks underneath a cabinet shelf create a simple second storage level while keeping handles easy to grab. Install hooks with enough spacing to prevent mugs from touching, and check that the shelf is sturdy enough for the added weight. Keep everyday cups toward the front and reserve higher or less accessible areas for occasional pieces. This arrangement frees the shelf surface for bowls, plates, or small containers while giving the cabinet a clean, organized appearance without taking up additional floor or counter space.
Choose hooks that match your cabinet hardware for a cohesive look, or use simple white or wood-toned options that blend into the interior. Avoid hanging oversized mugs if the cabinet clearance is limited because they can interfere with the shelf below. If you have several mug styles, group similar shapes together so the display feels intentional rather than random. I’ve noticed this method works especially well in compact kitchens where every shelf has to perform more than one job. Keeping a few favorite mugs visible also makes the cabinet feel more personal without creating visual clutter.
14. Clear Storage Bins
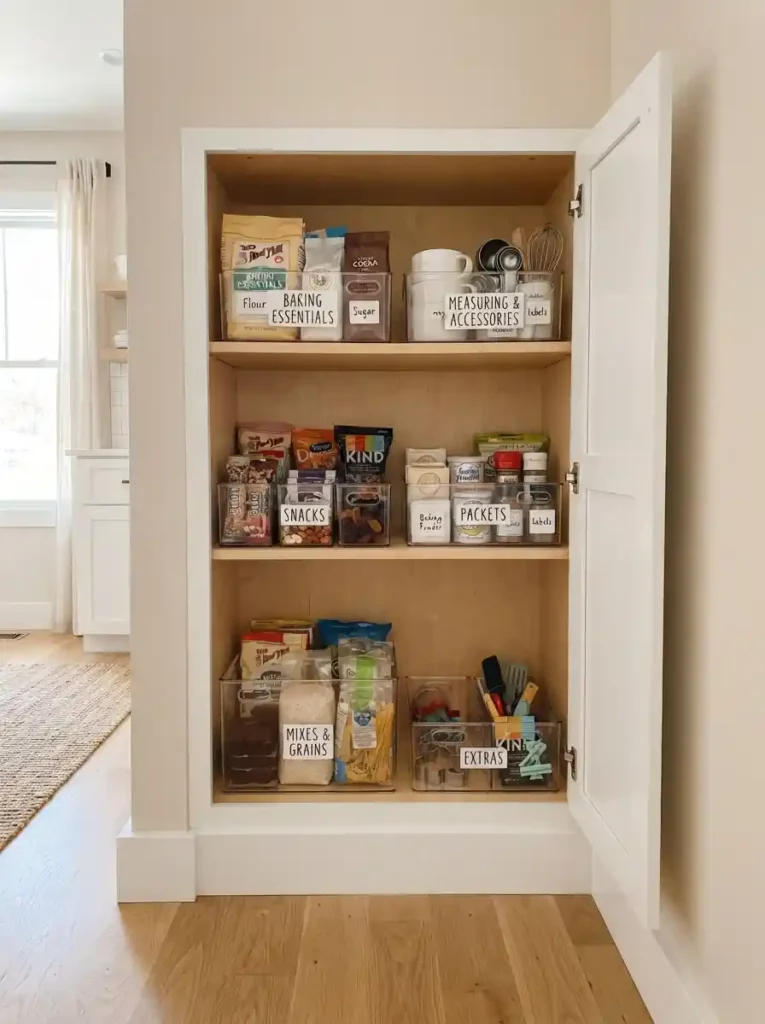
- Make small kitchen supplies visible at a glance.
- Group packets, baking items, and loose accessories together.
- Choose stackable bins for better vertical use.
- Keep categories separated to prevent mixed-up contents.
- Use transparent sides instead of opening every container.
Clear bins can make a crowded cabinet feel easier to understand because you can see what is inside before pulling anything forward. Use them for small packets, baking supplies, snack portions, coffee accessories, or loose kitchen tools that tend to scatter across shelves. Choose rectangular bins when possible because straight edges use cabinet space efficiently. Group similar items together and keep each container focused on one category. The transparent sides reduce unnecessary searching and help you notice when supplies are running low. For small kitchens, this visibility can make existing storage feel more generous without adding another piece of furniture.
Avoid filling clear bins to the top because an overflowing container quickly becomes difficult to use. Leave a little space so you can lift items out comfortably and see the contents clearly. Place heavier bins on lower shelves and lighter ones higher up. If several containers hold similar products, simple labels can make the system even faster to scan. In my experience, clear storage is most effective when it solves a specific problem rather than replacing every cabinet item with a bin. A few strategically placed containers can create order while preserving easy access to everyday essentials.
15. Narrow Baking Station
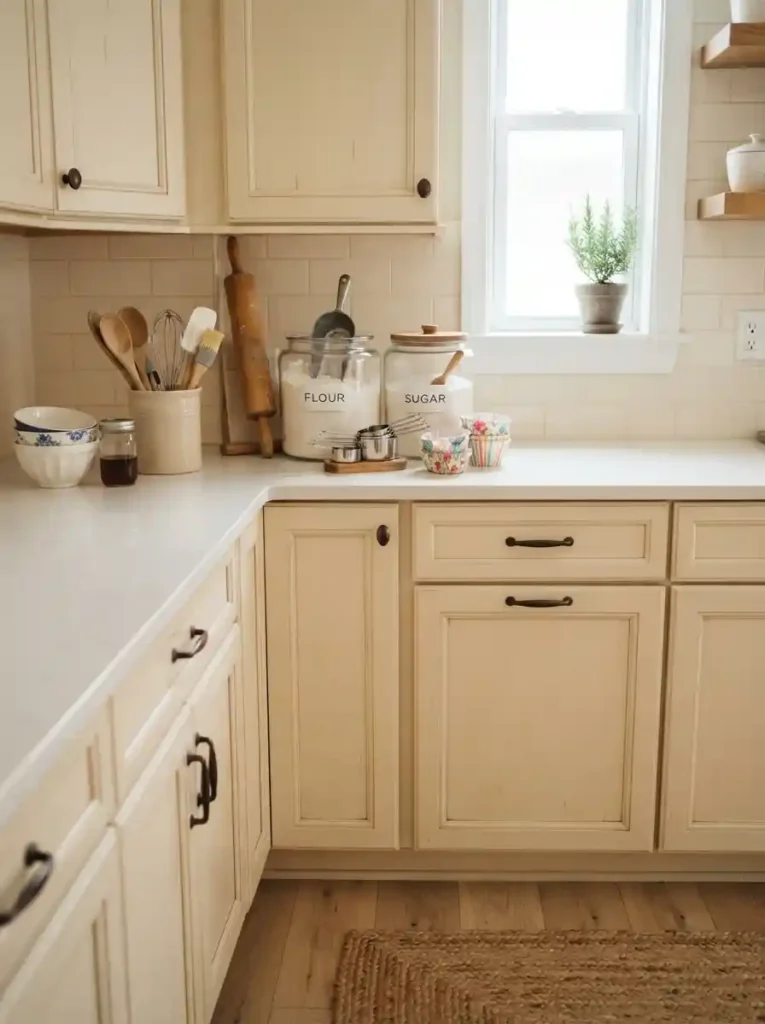
- Dedicate one cabinet zone to everyday baking supplies.
- Keep flour, sugar, liners, and tools together.
- Use matching containers to create visual consistency.
- Store measuring tools near frequently used ingredients.
- Reserve the deepest space for occasional baking items.
A dedicated baking zone can save valuable time when ingredients and tools are scattered across several cabinets. Group flour, sugar, baking powder, liners, measuring cups, and frequently used utensils in one compact area. Use clear containers for staple ingredients if they fit comfortably, and place measuring tools nearby so the entire setup supports one task. Keep everyday baking supplies at an easy-to-reach height while storing specialty ingredients farther back. This focused arrangement reduces cabinet searching and gives small kitchens a practical storage system that feels intentional rather than overcrowded.
You do not need a large pantry to create an efficient baking station. Start by identifying the ingredients and tools you actually use, then arrange them according to your routine. Place heavy ingredient containers on lower shelves and lighter supplies above them. A narrow basket can hold cupcake liners, decorating accessories, or small packets without letting them spread around. I’ve noticed that grouping supplies by activity often works better than organizing strictly by item type. When everything needed for one recipe is close together, preparation feels smoother, cleanup becomes easier, and the cabinet is much simpler to reset afterward.
16. Under-Sink Cleaning Caddy
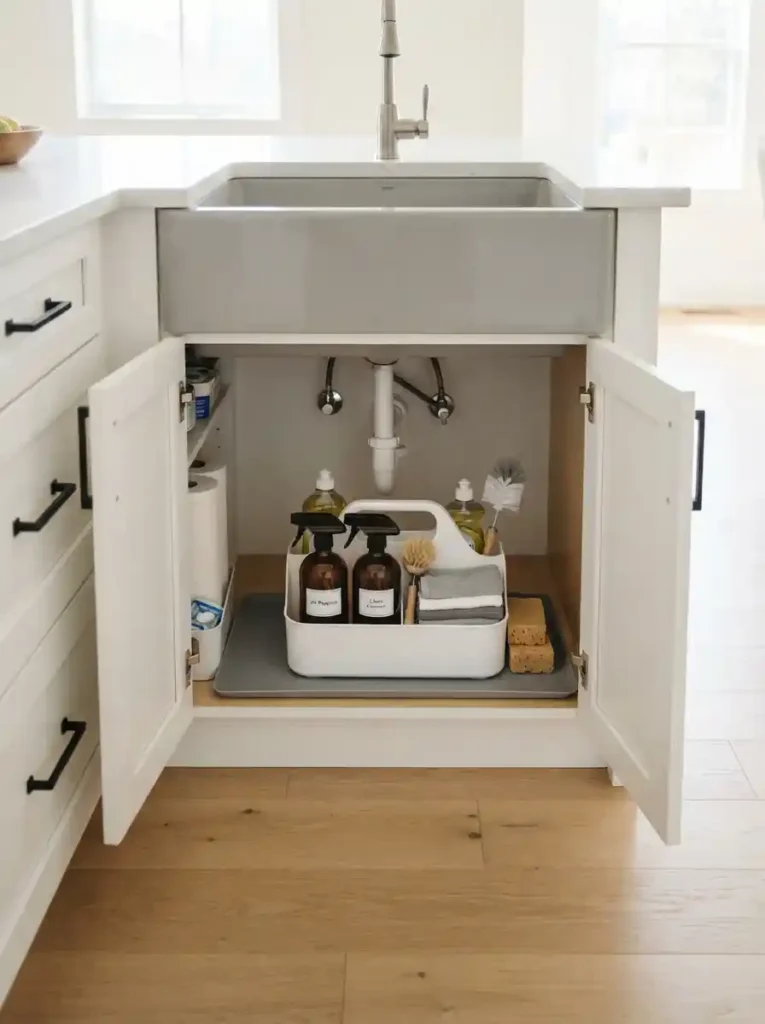
- Keep everyday cleaning supplies grouped in one portable caddy.
- Use vertical space for bottles and brushes.
- Separate cleaning products from other kitchen storage.
- Choose a leak-resistant tray for added protection.
- Remove the whole caddy when cleaning the room.
Under-sink cabinets often become cluttered because cleaning bottles, brushes, cloths, and extra supplies collect without a clear system. A handled caddy gives these items one defined home and lets you pull everything forward when cleaning. Choose a waterproof tray underneath to catch small leaks or drips, and keep products upright to reduce spills. Use the taller spaces for bottles while placing cloths and sponges in smaller sections. This arrangement makes an awkward cabinet easier to maintain because you can quickly see what you have instead of reaching through a crowded collection of half-used products.
Keep cleaning supplies separated from food, dishes, and cooking equipment, even in a compact kitchen. If children or pets can access the cabinet, use appropriate safety measures for household products and follow the labels on each item. A caddy should hold only what you regularly use, while backup supplies can live elsewhere if space is limited. I’ve noticed that portability is the biggest advantage here: you can lift the whole group out, wipe the cabinet, and return it without reorganizing individual bottles. That simple routine helps prevent buildup and keeps this difficult storage area manageable.
17. Appliance Garage Shelf
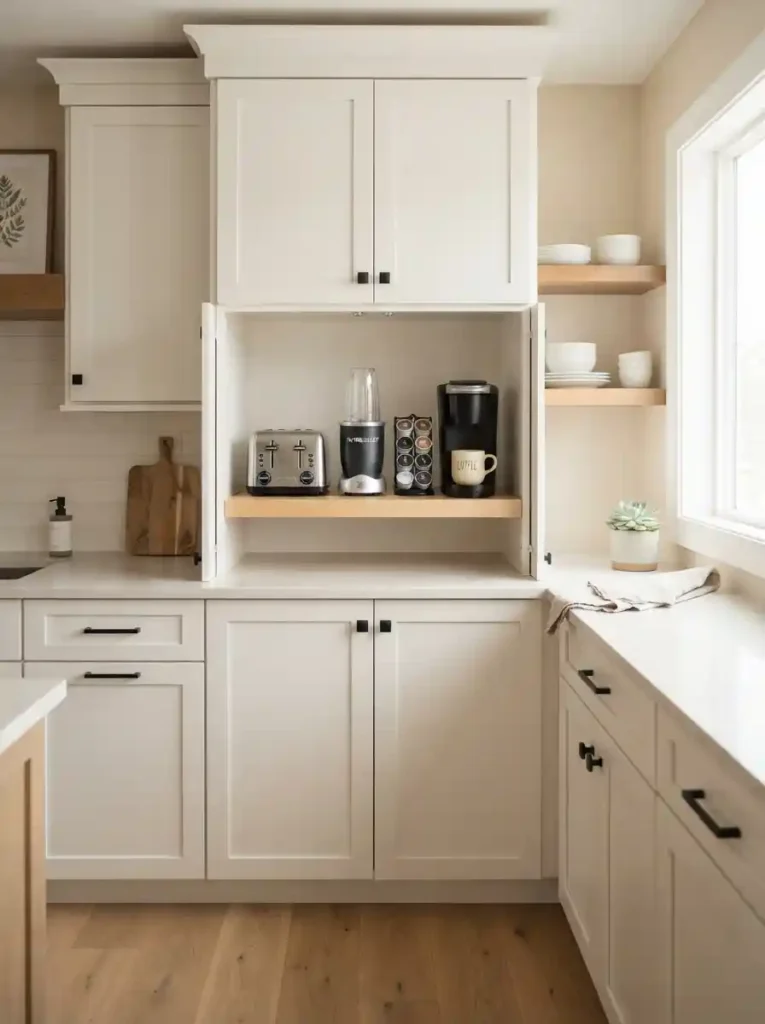
- Give small appliances a dedicated cabinet zone.
- Keep frequently used appliances together for faster access.
- Use shelves to separate appliances from accessories.
- Measure appliance height before assigning the space.
- Keep cords neatly contained instead of loosely tangled.
Small appliances can quickly take over counters when they have nowhere convenient to live. A dedicated cabinet shelf creates one home for a toaster, blender, hand mixer, or compact coffee equipment while keeping the countertop clearer. Measure each appliance before arranging the shelf, including the height needed to lift lids or remove attachments. Place heavier appliances on lower levels and keep lightweight accessories in a nearby basket. If an appliance is used several times a day, make sure the cabinet remains easy to open and access. Otherwise, the storage system may encourage you to leave it permanently on the counter.
The goal is convenience, not hiding every appliance at all costs. Choose a cabinet location that matches your daily routine, such as keeping coffee equipment near mugs or baking tools near the mixing area. Coil cords loosely and secure them without creating tight bends that make future use frustrating. In my experience, appliances stay off the counter more consistently when returning them takes only a few seconds. Give each machine enough breathing room so it can be lifted out without moving other items. This creates a calmer workspace while making the cabinet practical for everyday cooking.
18. Nested Mixing Bowls
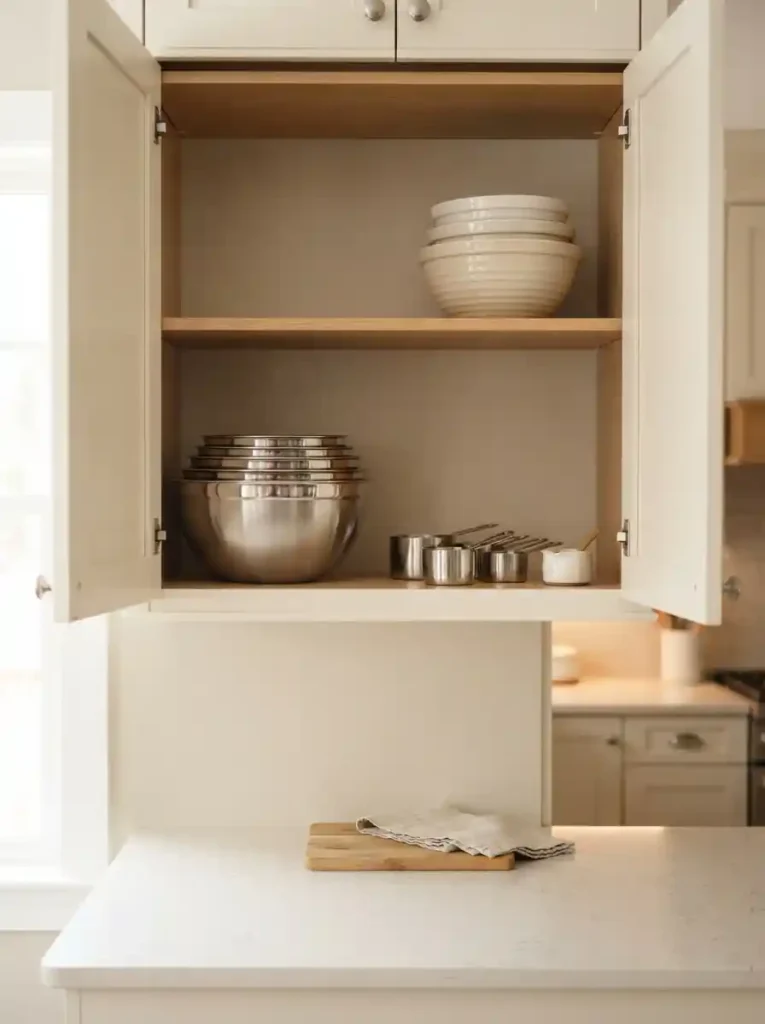
- Nest bowls by size to reduce wasted shelf space.
- Keep the largest bowl underneath smaller pieces.
- Place frequently used sizes toward the front.
- Use matching shapes for a cleaner stack.
- Store lids or accessories beside the nested set.
Mixing bowls can occupy a surprising amount of cabinet space when every piece sits separately. Nesting them from largest to smallest creates one compact stack and leaves more room for other essentials. Choose bowls with compatible shapes and sizes so they fit securely without becoming difficult to separate. Keep the largest bowl at the bottom and place smaller, frequently used pieces toward the top. Measuring cups or small utensils can sit inside the smallest bowl if they do not interfere with removal. This simple arrangement turns a bulky collection into one organized footprint that is easy to identify.
Avoid forcing bowls together if their shapes make them difficult to separate or if delicate finishes could become scratched. If your collection includes lids, keep those vertically beside the nested stack rather than placing them between bowls. You can also reserve one nearby basket for baking accessories to keep the entire preparation zone together. I’ve noticed that nested storage works particularly well in small kitchens because it reduces horizontal spread without requiring complicated organizers. When the bowls form one stable stack, the shelf looks calmer, and putting everything away after cooking becomes almost effortless.
19. Shelf-Edge Hooks
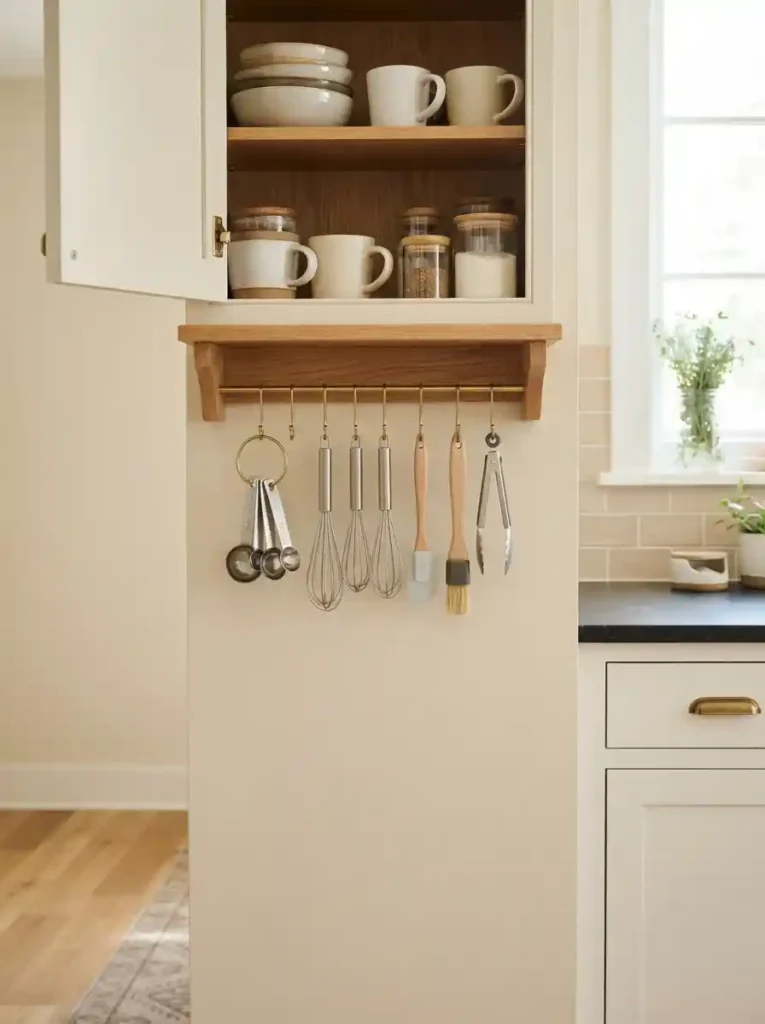
- Use cabinet shelf edges for small hanging tools.
- Keep measuring spoons and lightweight utensils together.
- Free drawer space for larger kitchen tools.
- Choose slim hooks that do not block shelf access.
- Hang only lightweight items to protect the shelf.
Small tools can easily overwhelm a drawer when they are mixed with larger utensils, but shelf-edge hooks create a simple alternative. Attach slim hooks beneath a sturdy cabinet shelf and use them for measuring spoons, small whisks, peelers, or lightweight utensils. Keep similar tools together so they are easy to identify, and leave enough space between each piece for comfortable removal. This setup works particularly well when drawer space is limited. Instead of letting tiny utensils disappear inside a crowded compartment, you turn unused shelf-edge space into an accessible storage zone that keeps everyday tools visible.
Before adding hooks, check the shelf construction and make sure the hardware will not interfere with the cabinet door or items stored underneath. Keep the heaviest tools elsewhere, especially if the shelf is adjustable or lightweight. A few hooks are usually enough; covering the entire edge can make the cabinet look busy. In my experience, this idea works best for tools used frequently because visibility encourages quick access and easy return. When each utensil hangs in a defined spot, the surrounding shelf remains clearer, making the entire cabinet easier to scan and reset after cooking.
20. Pantry Door Pockets
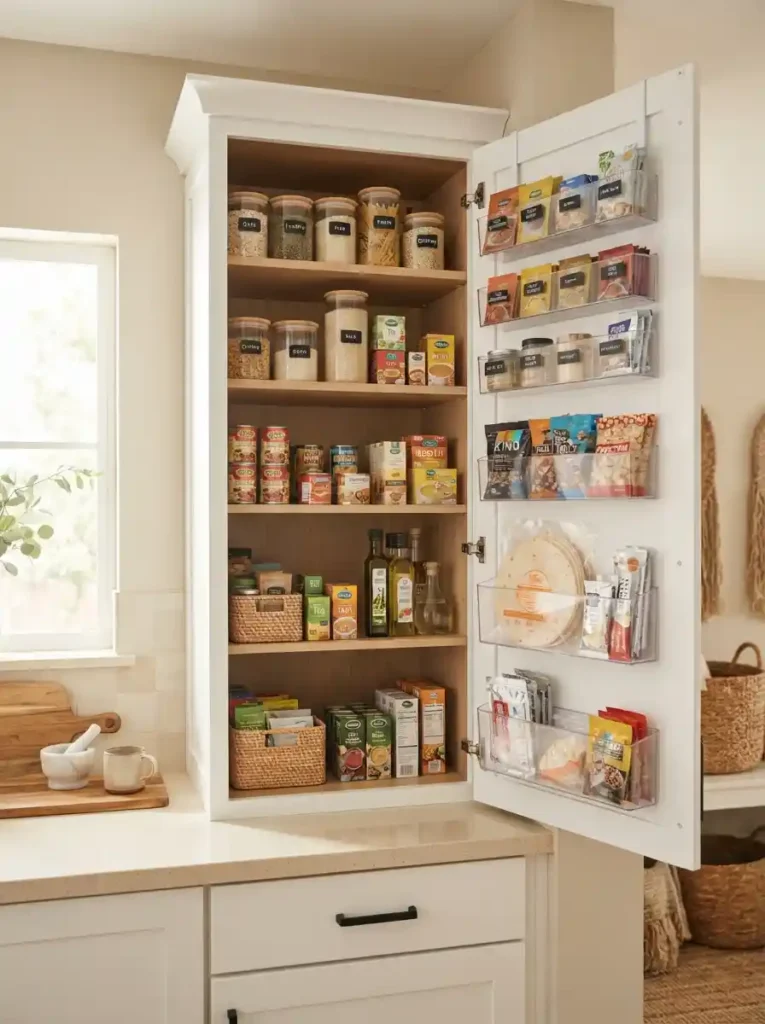
- Turn the inside of a cabinet door into extra storage.
- Hold packets, wraps, snacks, and small pantry items.
- Choose clear pockets for faster visual scanning.
- Keep heavier products on lower sections.
- Avoid overloading the door with bulky containers.
The inside of a pantry or cabinet door can provide valuable storage without taking away shelf space. Clear pockets are especially useful for small packets, wraps, snack portions, seasoning sachets, or other lightweight items that often become buried behind larger products. Arrange the pockets by category and keep frequently used supplies at comfortable hand height. Transparent materials make contents visible immediately, while shallow compartments prevent small packages from disappearing into the back. This is a smart solution for compact kitchens because it adds accessible storage to an area that would otherwise remain completely unused.
Door pockets should stay lightweight enough to keep the cabinet opening smoothly. Check the available clearance before installation, particularly if your shelves extend close to the door. Keep taller or heavier products on lower sections and reserve upper pockets for lightweight items. If you already have a crowded pantry, start with just one category, such as baking packets or food wraps, rather than transferring everything at once. I’ve noticed that focused door storage is easier to maintain because each pocket has an obvious purpose. The result is better visibility, faster access, and less shelf clutter without changing the cabinet layout.
21. Double-Tier Bins
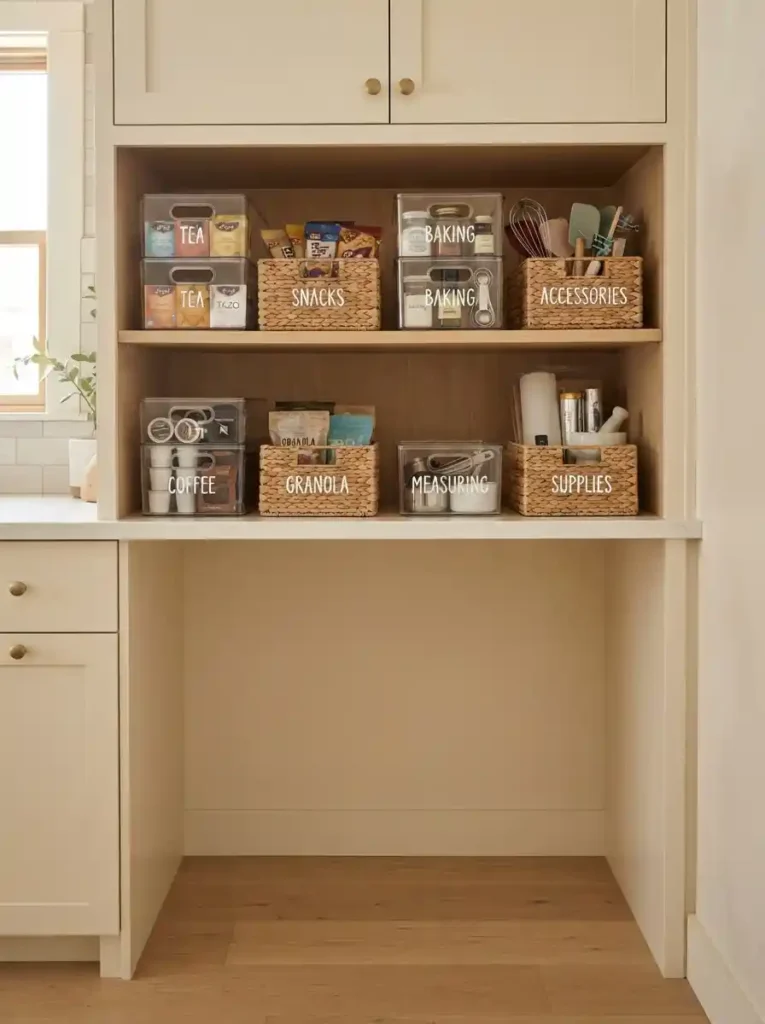
- Create two compact levels for small cabinet supplies.
- Keep similar items separated by shelf height.
- Use stackable bins to maximize vertical space.
- Store everyday products on the easier-to-reach level.
- Leave enough clearance to lift each bin comfortably.
Tall cabinet shelves often leave empty space above short containers, making double-tier bins an efficient way to use the full height. Stack two compatible bins or use a purpose-built organizer with an upper platform, keeping lightweight supplies on top and heavier items below. This setup works well for tea packets, snacks, baking accessories, small tools, or extra kitchen linens. Choose bins that can be removed individually so reaching the lower level does not require dismantling the entire arrangement. The added layer increases capacity while keeping smaller items grouped, visible, and easier to return after everyday use.
The key is maintaining enough clearance between levels for comfortable handling. Measure the height of your tallest item before choosing a stacked system, then leave a little extra room for lifting. Keep the items you use most often on the lower or easiest-to-reach level, while occasional supplies can occupy the upper section. Clear bins improve visibility, while woven or solid containers create a softer visual effect. In my experience, double-tier storage is most useful when categories remain simple. Two organized levels are far easier to manage than one overcrowded shelf filled with unrelated items.
22. Utensil Dividers
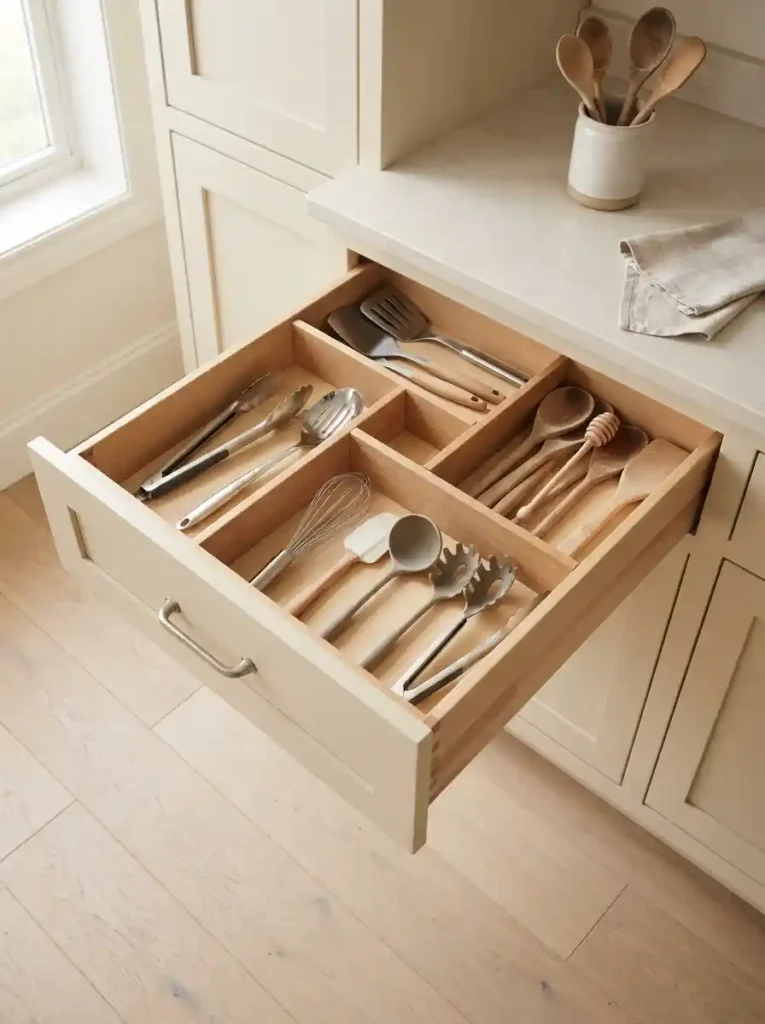
- Separate cooking tools by type inside deep drawers.
- Keep spatulas, tongs, and serving tools easy to identify.
- Use adjustable dividers to fit the available space.
- Place frequently used utensils toward the front.
- Remove duplicates that make compartments unnecessarily crowded.
A crowded utensil drawer becomes much easier to use when every tool has a defined section. Add adjustable dividers to separate spatulas, wooden spoons, tongs, whisks, and serving tools according to how you actually cook. Keep the pieces you reach for most often toward the front and move occasional tools into less accessible sections. Choose dividers that fit snugly without wasting drawer width. This simple arrangement prevents utensils from becoming tangled and makes it easier to spot duplicates. A well-divided drawer also supports better kitchen cabinet organization ideas because every tool gets a predictable place.
Avoid creating too many tiny compartments, especially if you own only a few tools in each category. Wider sections usually make it easier to return utensils quickly after washing. Before organizing, remove broken, duplicated, or rarely used pieces that take up valuable space. I’ve noticed that reducing the collection first often makes a bigger difference than buying more organizers. Once the drawer contains only useful tools, dividers can keep everything separated without making the system complicated. The result is a cleaner drawer, faster meal preparation, and less frustration when you need one specific utensil.
23. Removable Wire Baskets
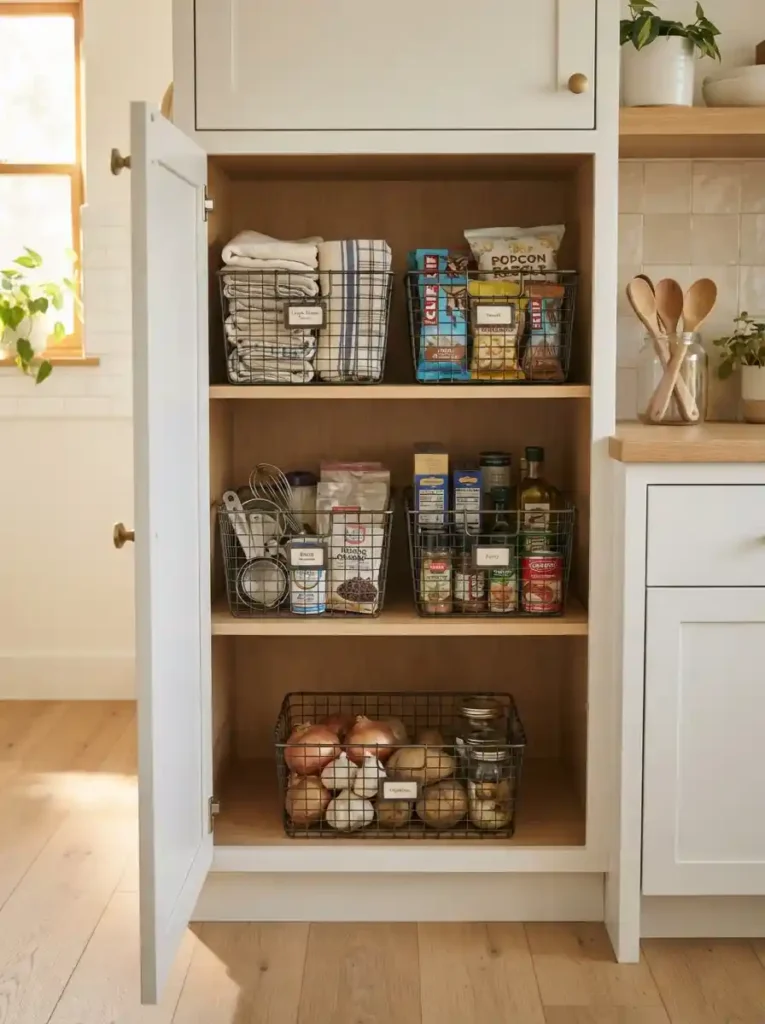
- Create flexible storage for changing kitchen supplies.
- Pull baskets forward to reach deep cabinet contents.
- Use separate baskets for snacks, towels, or accessories.
- Choose open wire designs for quick visibility.
- Keep basket contents light enough for easy handling.
Removable wire baskets can turn a deep, awkward shelf into flexible pull-forward storage. Instead of reaching behind several items, you simply slide one basket toward you and access the contents at the front. Use separate baskets for kitchen towels, snack packets, baking accessories, or pantry overflow, depending on the cabinet location. Open wire construction keeps items visible and allows air to circulate around linens. Choose baskets with handles or sturdy edges so they are comfortable to lift. This setup is especially useful when cabinet depth makes traditional shelf organization difficult or when storage needs change regularly.
Keep each basket focused on one practical category so it does not become another miscellaneous container. For example, one can hold baking supplies while another stores small pantry items. Avoid making baskets too heavy, especially when they sit on higher shelves. If you frequently rearrange your kitchen, removable storage also gives you flexibility without permanent installation. In my experience, baskets work best when they create clear zones rather than simply adding more containers. When each basket has a purpose, the cabinet becomes easier to scan, restock, and clean without requiring a complicated organizing routine.
24. Color-Coded Containers
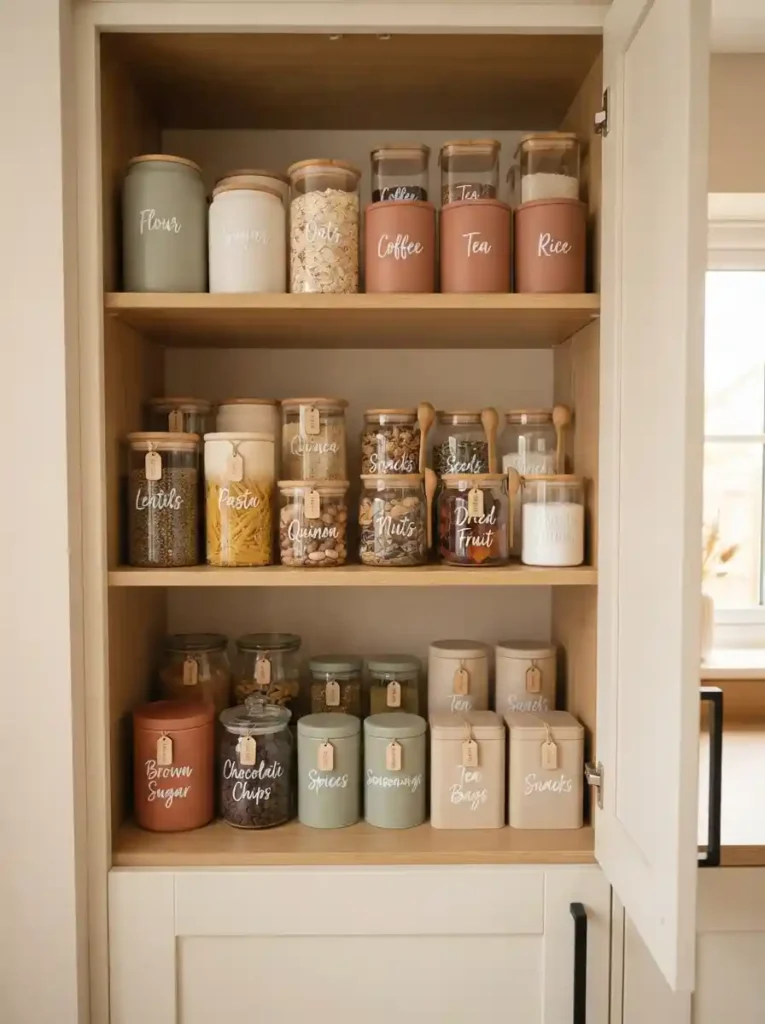
- Use subtle colors to separate different storage categories.
- Make frequently used ingredients easier to identify.
- Choose a limited palette for a cohesive appearance.
- Match container colors with the kitchen aesthetic.
- Avoid too many shades that create visual clutter.
A small amount of color can make cabinet storage easier to understand while adding personality to an otherwise plain interior. Choose two or three coordinated container colors and assign them simple categories, such as baking ingredients, snacks, or everyday pantry staples. Soft shades like cream, sage, muted blue, or warm terracotta can create visual distinction without making the cabinet look chaotic. Keep the container shapes consistent so the colors become helpful signals rather than competing decorations. This approach can make frequently used supplies easier to locate while giving the cabinet a more intentional, styled appearance.
The system works best when color has a clear purpose. For example, one shade could identify baking supplies while another marks breakfast items. Keep the palette limited and avoid changing colors randomly between shelves, because consistency improves recognition. Clear labels can still be useful when similar ingredients look alike. I’ve noticed that subtle color coding is particularly effective for busy households because family members can quickly understand where items belong. It also makes restocking easier: when one category starts looking incomplete, the visual gap is immediately noticeable, helping the cabinet stay organized with less effort.
25. Back-of-Door Towel Bars
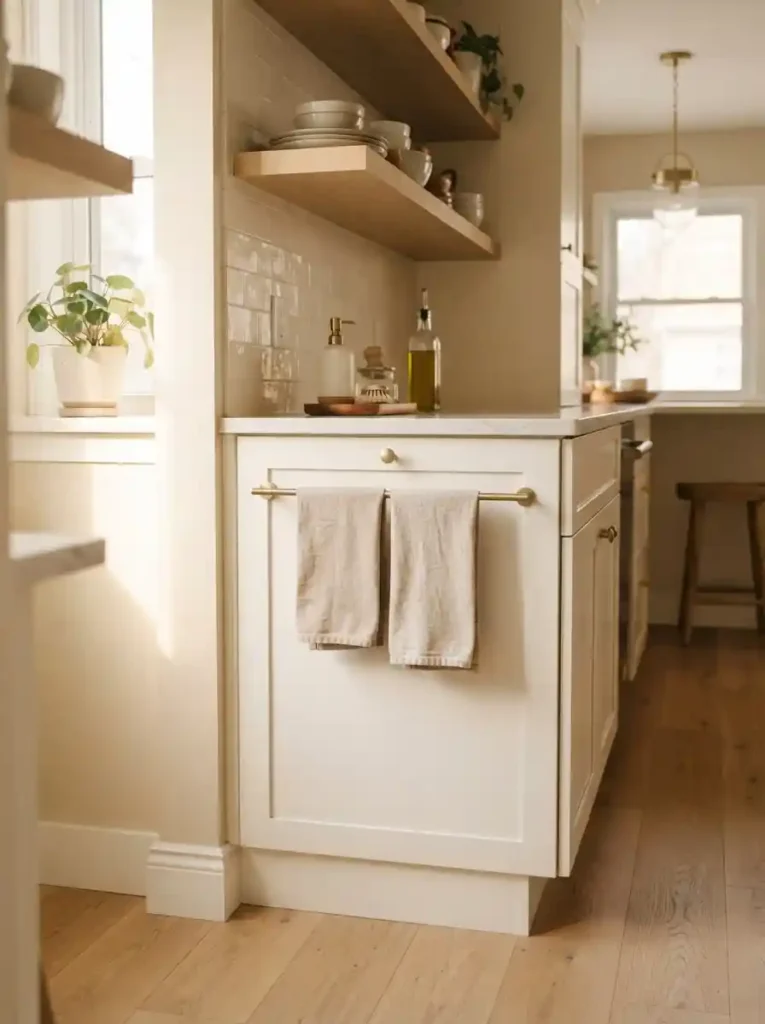
- Turn unused cabinet-door space into towel storage.
- Keep everyday kitchen towels easy to reach.
- Choose slim bars that preserve interior shelf clearance.
- Use coordinated towels for a cleaner visual finish.
- Leave enough space for towels to dry properly.
A simple towel bar can solve a surprisingly common storage problem in a small kitchen. Mount one inside a cabinet door to keep everyday towels accessible without using a drawer or countertop hook. Choose a slim bar that leaves enough clearance for shelves and stored items, then hang one or two lightweight towels rather than creating a bulky bundle. Neutral linen, cream, or soft gray towels can blend naturally with the cabinetry. This arrangement keeps towels close to the sink while freeing visible kitchen surfaces, making the room feel cleaner and more organized during everyday cooking.
Check the cabinet door clearance before installing the bar, especially if shelves sit close to the interior panel. Avoid placing the towel directly against cleaning products or areas where moisture could remain trapped. If drilling is not suitable, look for an over-door option designed for cabinet use. In my experience, small storage changes like this often have the biggest daily impact because they remove one recurring source of clutter. Give the towel a consistent home, keep the bar lightly used, and the cabinet door becomes a practical storage surface instead of unused space.
Conclusion
An organized cabinet can make a small kitchen feel larger, calmer, and much easier to use. From vertical dividers and pull-out trays to clear bins, shelf risers, and door storage, these ideas help every inch work harder. The biggest transformation comes from choosing systems that match how you actually cook, clean, and reach for everyday items. In my experience, even one well-planned cabinet can reduce daily frustration. Save this post on Pinterest for your next organizing project, try one idea in your own space, and share it with someone who could use a little less kitchen clutter. Small changes can make a big difference.